To redact a document, follow the steps below.
-
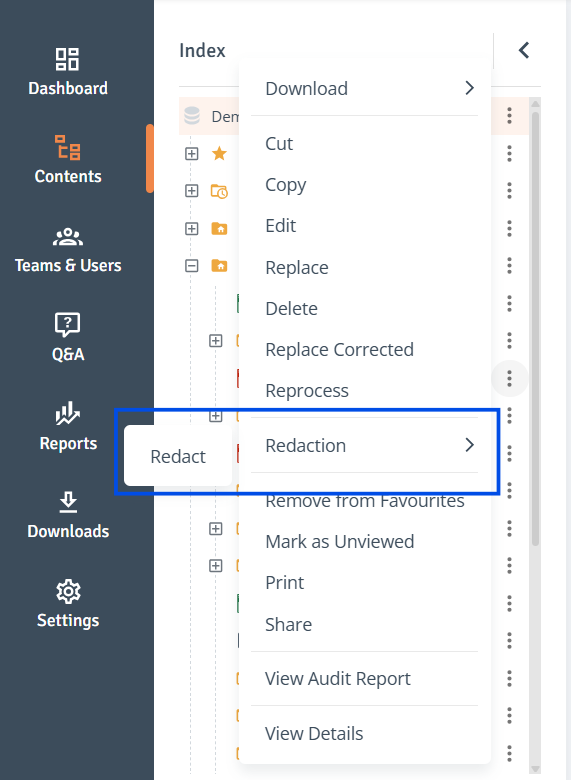
Select Document: In the Index tree or the Contents table on the right, click the three-dot menu next to the document and select ‘Redaction’ and then 'Redact'.
-
Redaction Disclaimer: Before proceeding, ensure to carefully read the Disclaimer. Your acknowledgement will be required to continue.
-
Redaction Editor: A new Redaction Editor window will open in your browser.
-
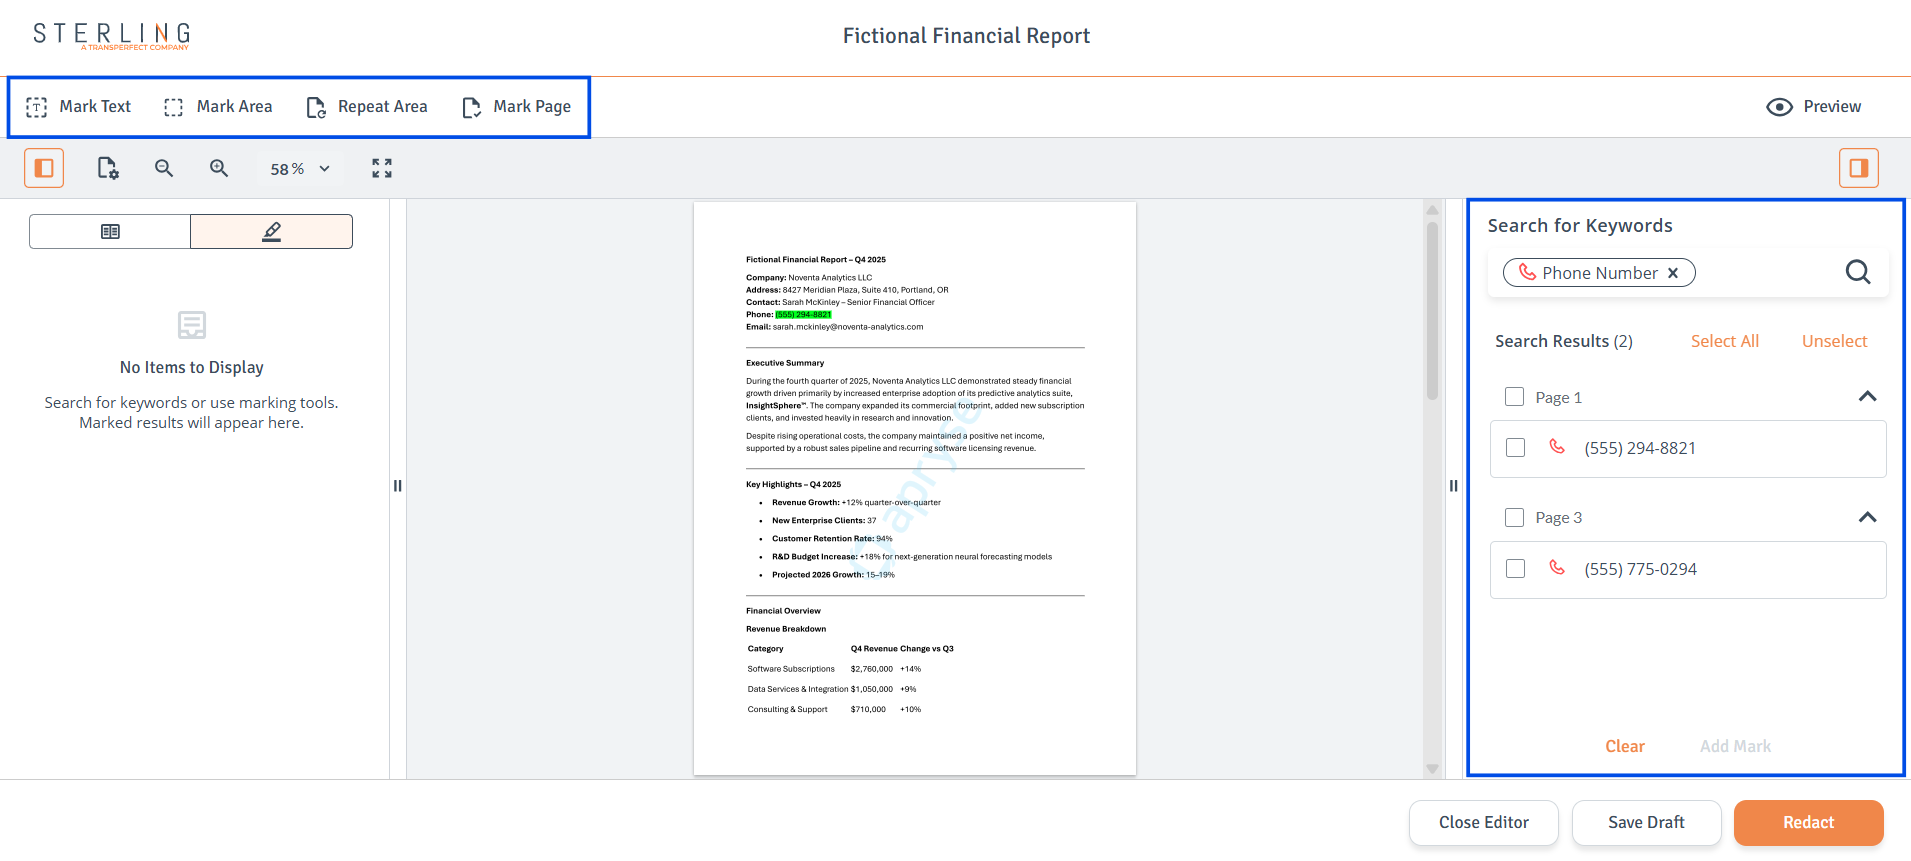
Search or Select Content: Use the search panel on the right or the manual marking tools at the top left to identify information to redact.
-
Add Marks:
-
When using manual tools, marks are applied directly to the selected areas.
-
When performing a search, you must review the results and select which items to mark for redaction.
-
-
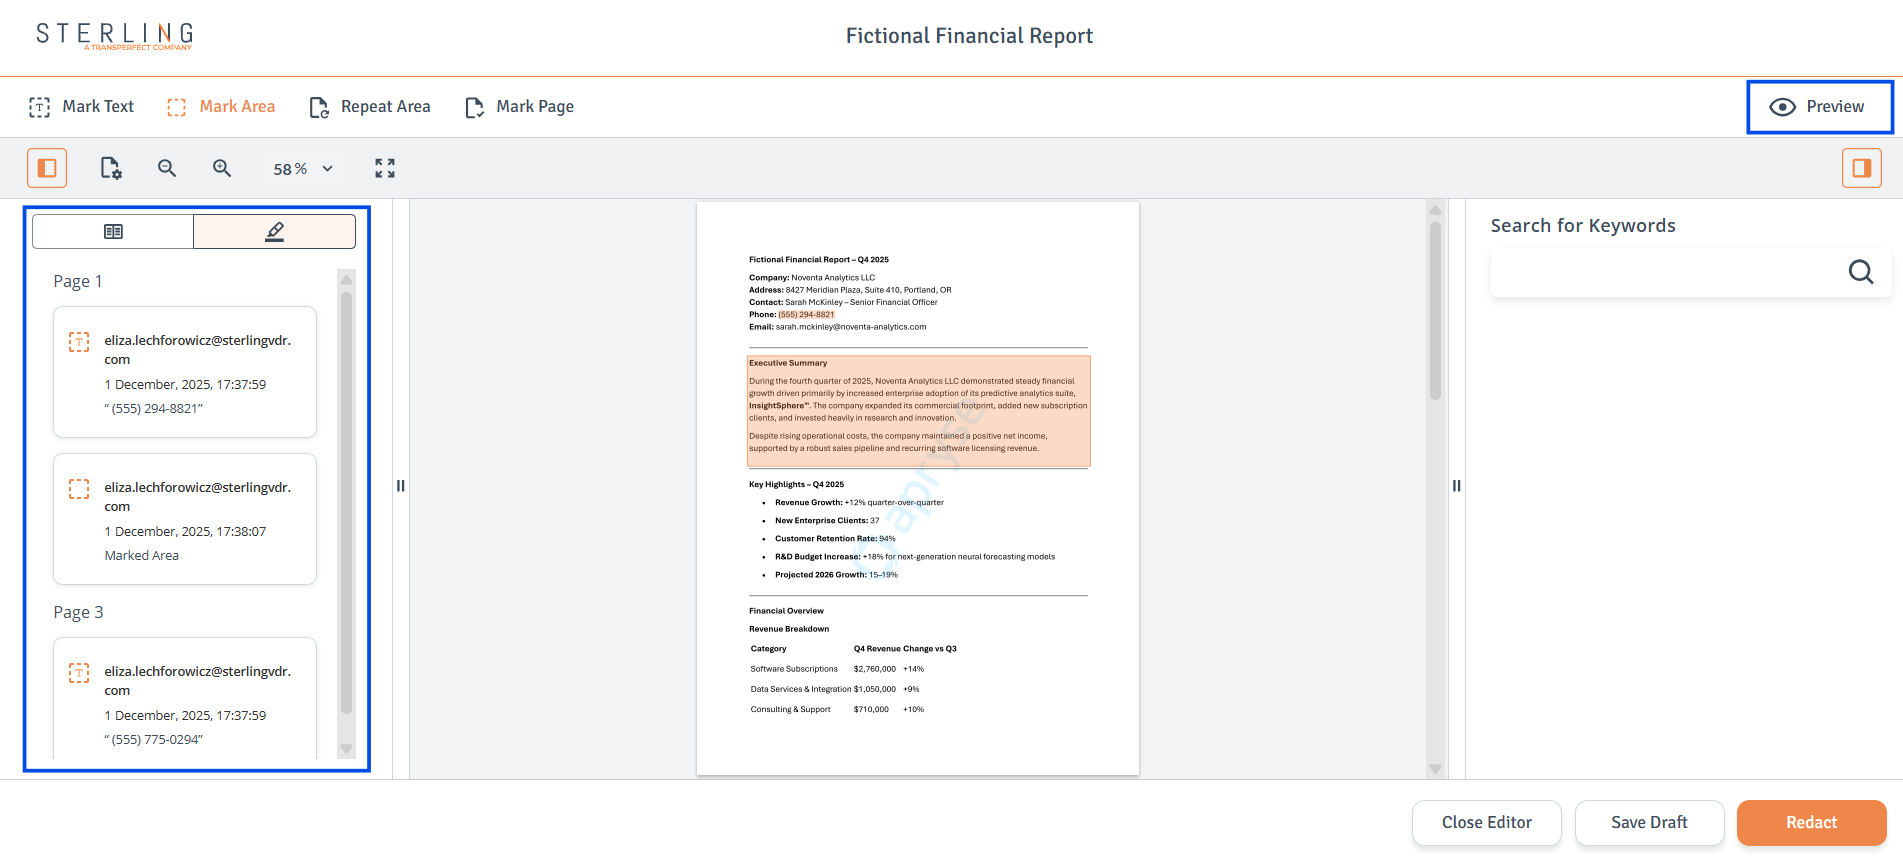
Review Marks: All marks appear in the left-hand markings panel for final review.
-
Preview Redactions: Use the ‘Preview’ button at the top-right of the editor to see how the document will appear once redactions are applied.
-
Save Draft: The redaction session can be saved as a draft at any time. Saved drafts can be reopened later, and other users with access to the document can view the existing markings before continuing the redaction work.
-
Apply Redactions: When ready, click ‘Redact’ to apply the redactions.
Unredact Document
To unredact a document, follow the steps below.
-
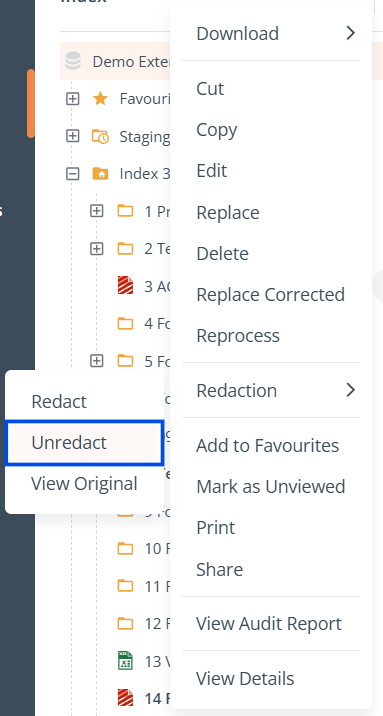
Select Document: In the Index tree or the Contents table on the right, click the three-dot menu next to the document and select ‘Redaction’ and then 'Unredact'.
-
Confirmation Modal: A confirmation modal will be displayed. Once confirmed, the unredacted file will be accessible in the Project.
Using Search Panel
The search panel on the right helps quickly locate and mark text patterns, such as names, email addresses, phone numbers, or keywords.
-
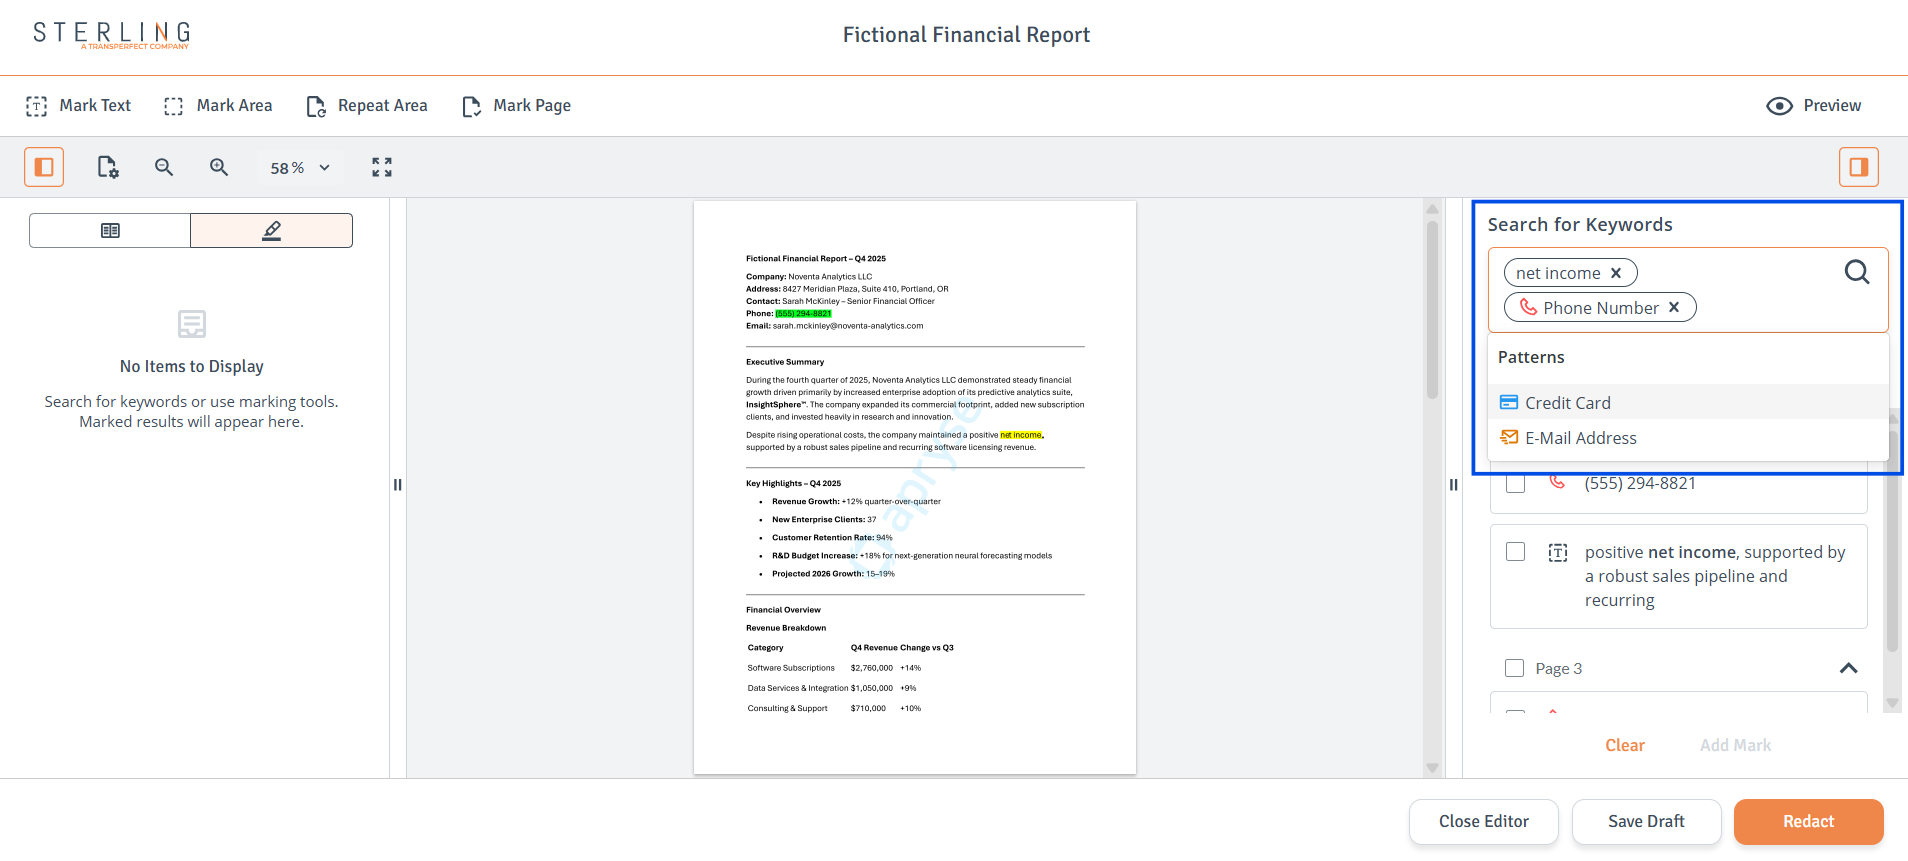
Search for Keywords, Phrases or Patterns: Enter a search term or phrase, or choose one of the available patterns (credit card, phone number, or email address). Matching results will be displayed in a list with checkboxes.
-
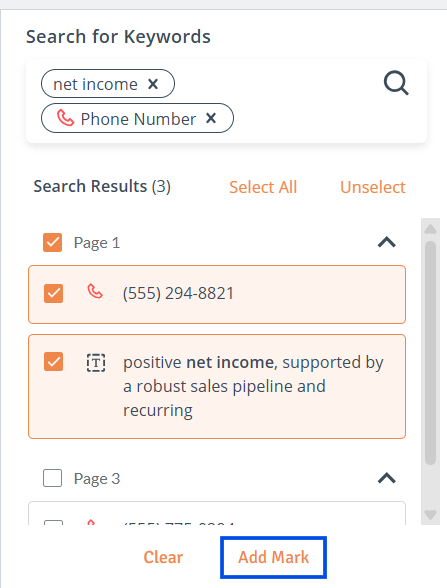
Select Results: Check individual items or use the top checkboxes to select all results on a specific page.
-
Add Mark: Select ‘Add Mark’ to add the selected results to the left-hand panel as redaction marks.
-
Clear: Clear all search results.
Marking Content Manually
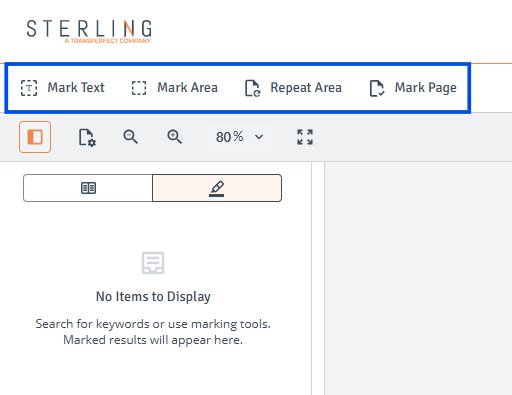
In addition to the search panel, you can mark content directly on the page using toolbar tools:
-
Mark Text: Highlight specific text to mark it for redaction.
-
Mark Area: Draw a box around images, signatures, or any visual area for redaction.
-
Repeated Area: Select an area to be repeated on selected pages for redaction.
-
Mark Page: Select an entire page for redaction.
Managing Redaction Marks
All added marks appear in the left-hand panel.
-
Review Each Mark: Click on a mark to jump to its location in the document.
-
Preview Redactions: Use the ‘Preview’ button at the top-right of the editor to see how the document will appear once redactions are applied.
-
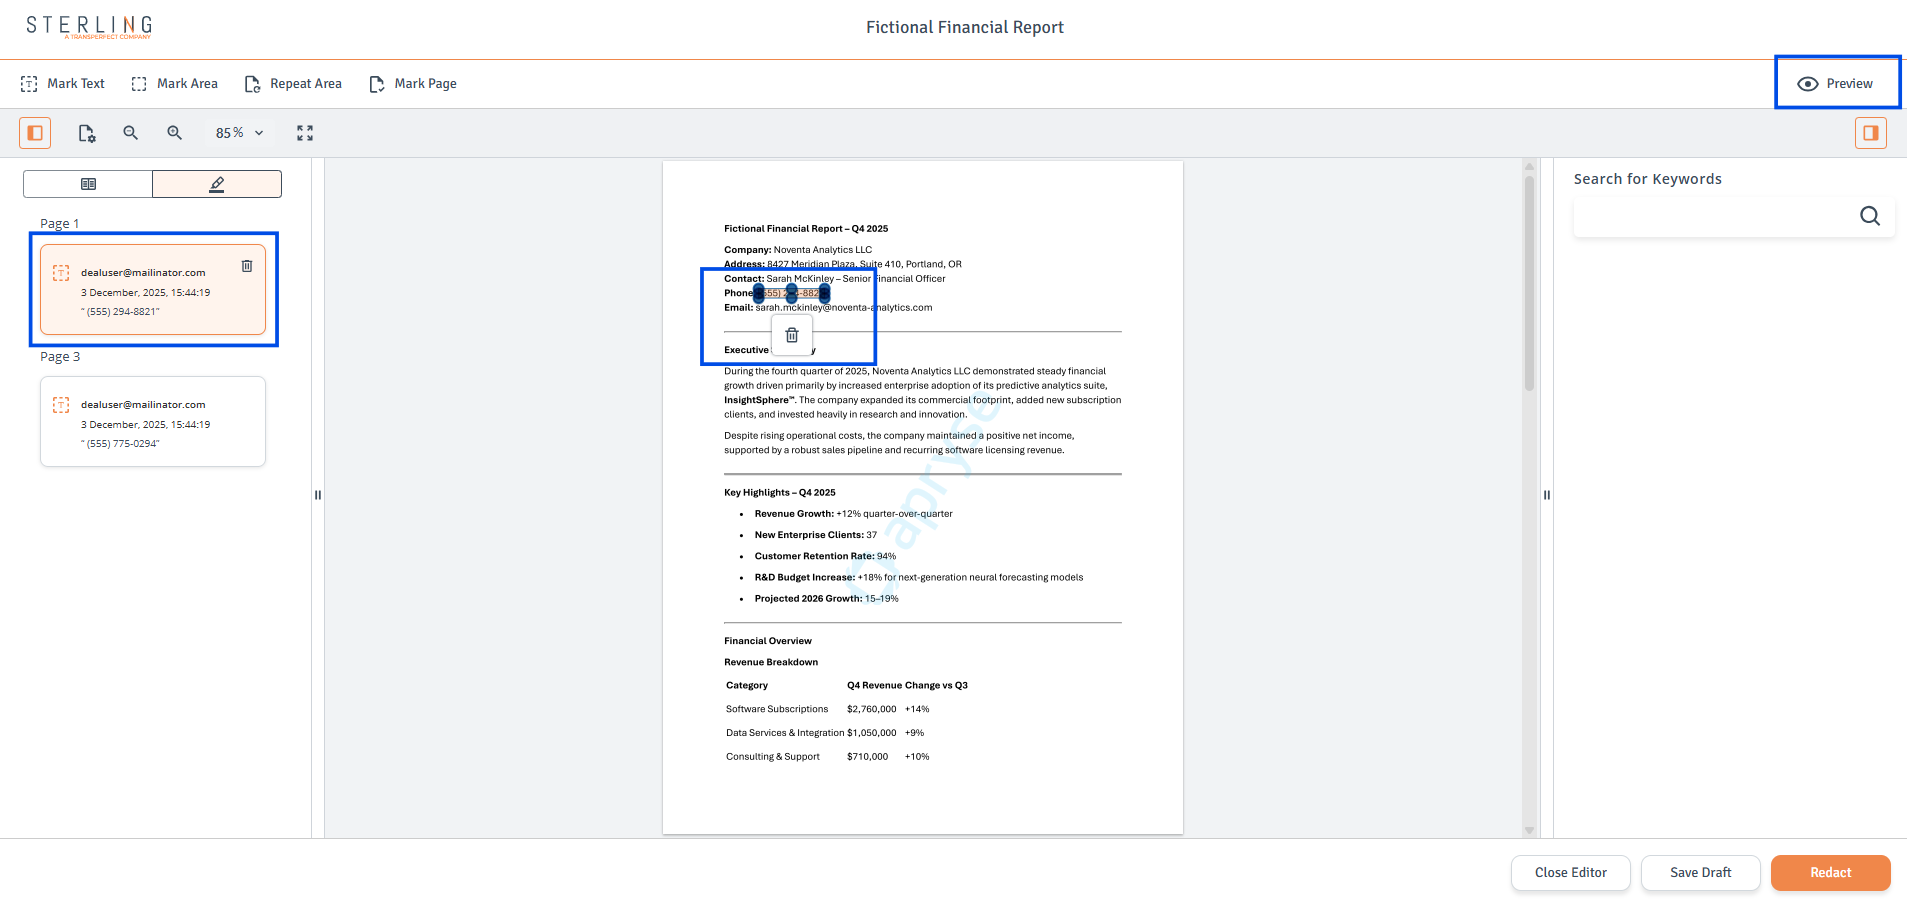
Remove Marks: Click on a mark in the left-hand panel. When the Bin icon appears in the top-right corner, select it to remove the mark.
-
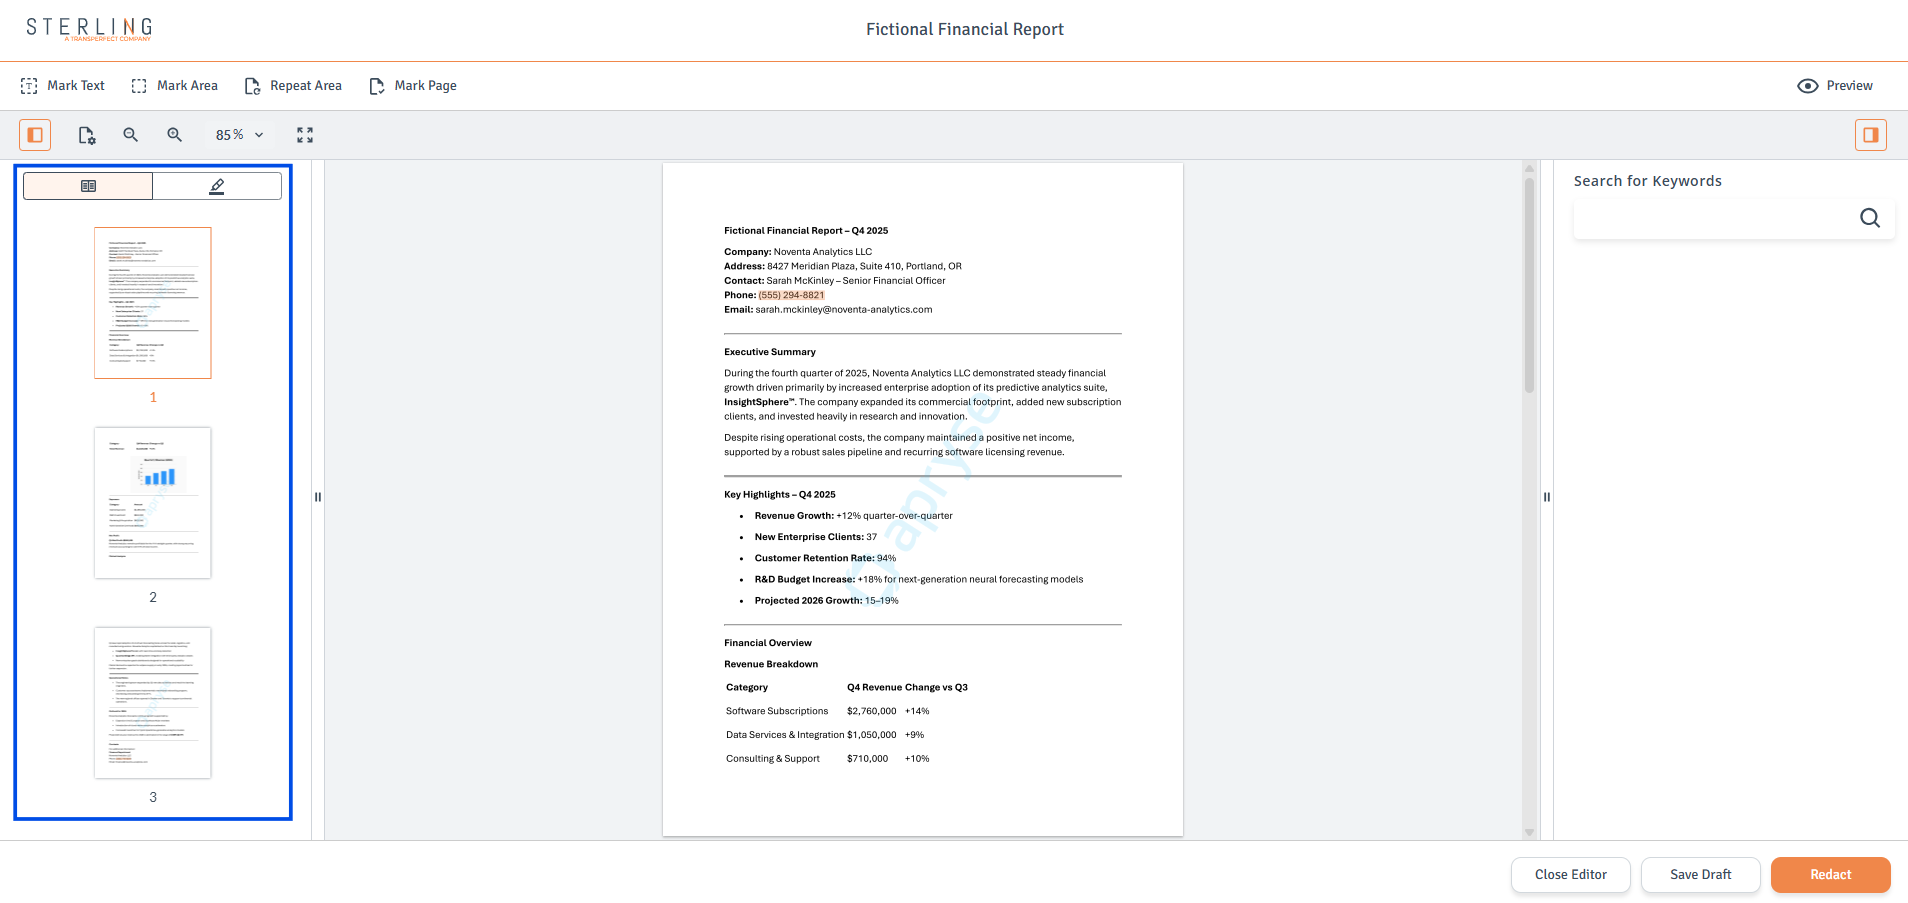
Multi-Page Review: Use the thumbnail panel to move between pages and verify that everything is marked appropriately.
Page Settings
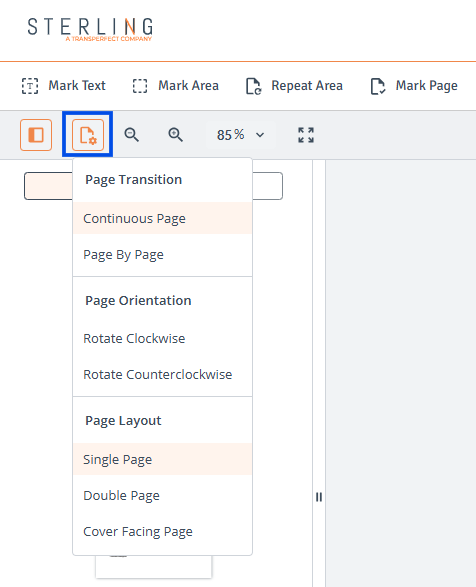
The viewer menu allows adjustment of how the document is displayed and navigated:
-
Page Transition:
-
Continuous Page: Scroll through the entire document in a seamless vertical flow.
-
Page by Page: Move through the document one page at a time for controlled, focused viewing.
-
-
Page Orientation:
-
Rotate Clockwise / Rotate Counterclockwise: Change page orientation when a page appears sideways or needs correction.
-
-
Page Layout:
-
Single Page: Display one page at a time for a clean, uncluttered view.
-
Double Page: View two pages side by side, similar to a book spread.
-
Cover Facing Page: Show the cover page on its own, followed by two-page spreads for a realistic book-style layout.
-
-
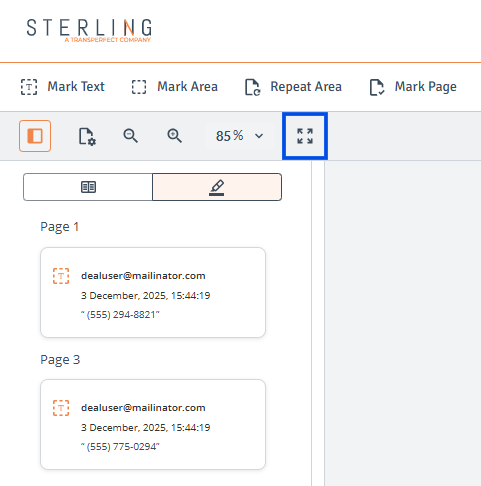
Enter Full Screen: Expand the viewer to full screen for distraction-free reading, reviewing, or presenting.